Products
Solutions
Resources
9977 N 90th Street, Suite 250 Scottsdale, AZ 85258 | 1-800-637-7496
© 2024 InEight, Inc. All Rights Reserved | Privacy Statement | Terms of Service | Cookie Policy | Do not sell/share my information

Retro rate adjustments are used to correct rates (most commonly, billing rates) on locked timesheet records when rates are updated after timesheets have been processed by a LEM or invoice, or other process export. Only locked timesheet records that have been previously processed by a LEM or invoice (or other process export) are affected. Unlocked timesheet records will always reference the current rate that is in effect.
The process compares the rate stored with each locked record with the current rate table. If there is a difference, credit and debit entries are created in a timesheet to adjust the discrepancy.
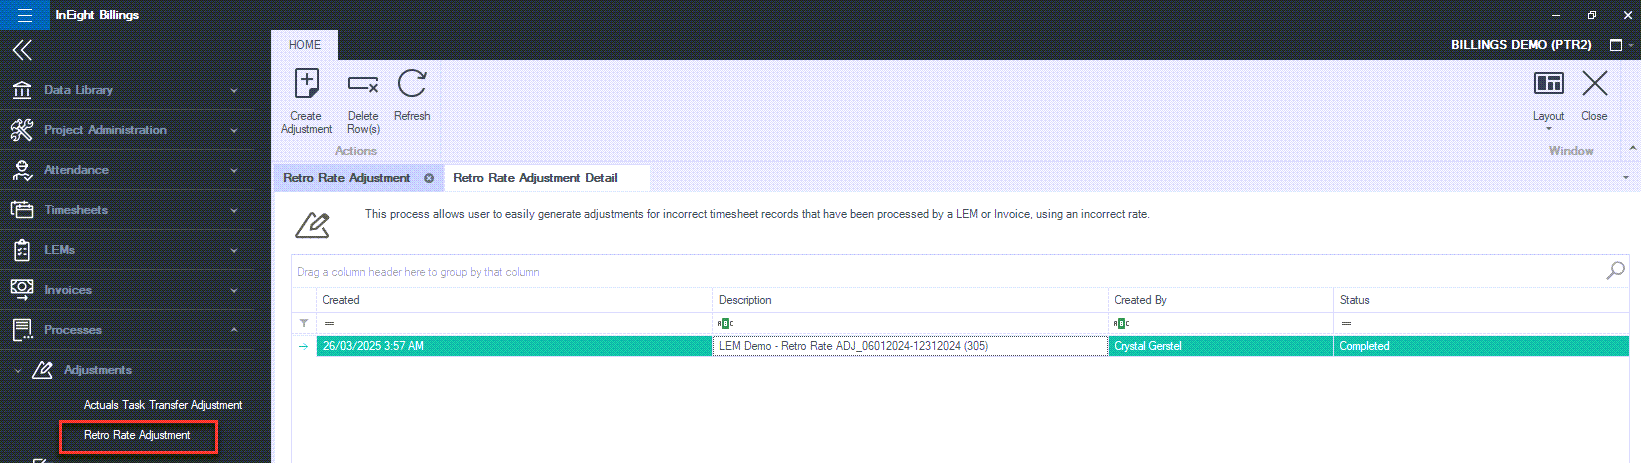
Select Processes > Retro Rate Adjustment.
/Billings Setup_214.png)
Click Create Adjustment in the top ribbon.
/Billings Setup_216.png)
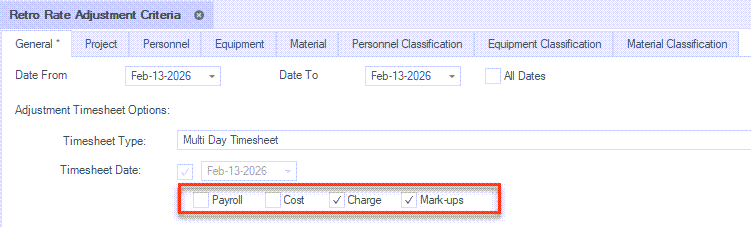
Select the date range that you want the adjustment to be applied or select All Dates .

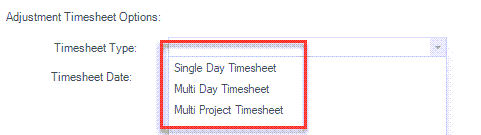
Select the Timesheet Type:
Single Day: Creates one timesheet per impacted work date.
Multi-Day: Creates one timesheet per month (recommended).
Multi-Project: Rarely used; combines multiple projects into one timesheet per month.
In integrated environments that use InEight Platform, make sure the Payroll and Cost options are not selected. Select Charge option when the rate table has been updated. If you also need to apply adjustments related to project markups, select the Markups option as well.
Enter a name for Adjustment Result. Include the project number and a brief description of the purpose for the rate adjustment.
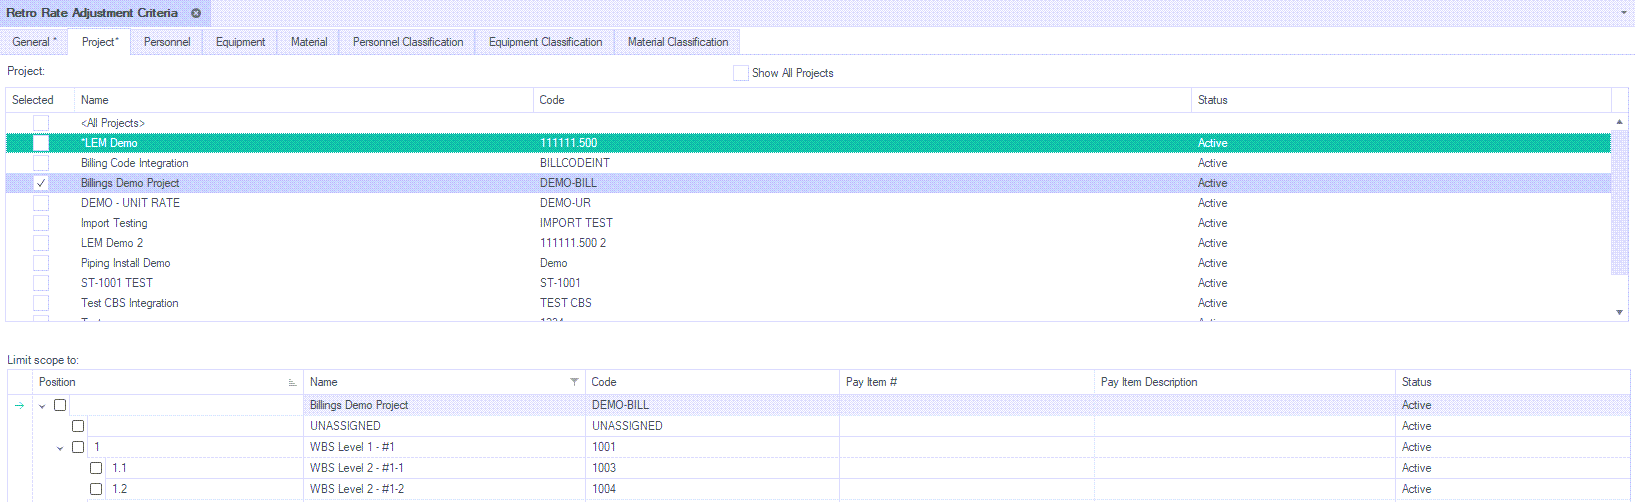
Select a project. If you chose the Multi-Project option select all the applicable projects. It is not recommended (but is possible) to run a Retro Rate adjustment for multiple projects at once, but it is a lot harder to validate the results.
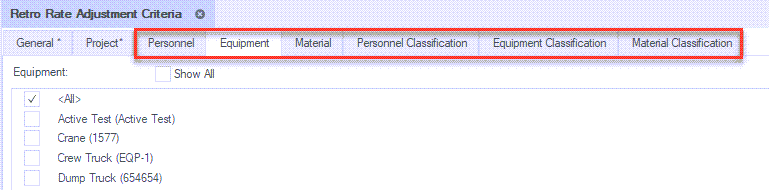
When running a Retro Rate for Personnel or Equipment, select <All> unless you are targeting a specific resource.
For Personnel adjustments, set both the Personnel tab and the Personnel Classification tab to <All>, unless adjusting a specific person or classification. Deselect all other tabs, as Personnel, Equipment, and Material adjustments should be run separately.
Click the Submit icon located on the ribbon bar when you are done setting the parameters to initiate the adjustment. A dialog box opens indicating the process was submitted.
/Billings Setup_217.png)
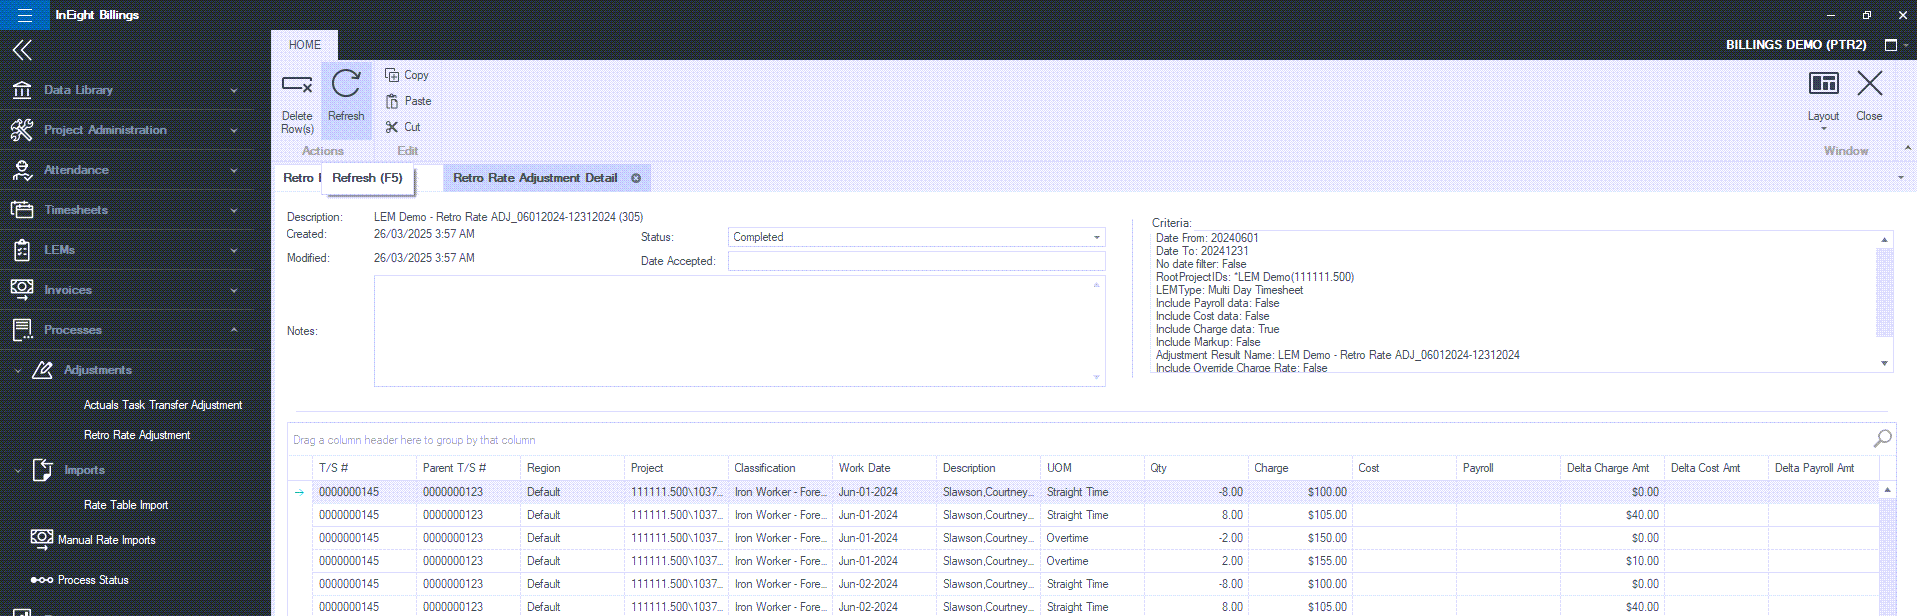
To verify the timesheet records that have been generated, go to the Retro Rate Adjustment tab and select the item you added from the list.
Go into the Retro Rate List and double click the results to view the adjustments.
If there are adjustments that the user doesn’t want to keep, individual adjustments can be removed. By removing a record, it will delete both the credit and debit record automatically, as Billings will not retain one record without the other matching adjusting entry.
If the entire adjustment was created in error, select the result from the Retro Rate List, and click delete on the ribbon bar. This will delete all the timesheets that were generated.
Additional Information
9977 N 90th Street, Suite 250 Scottsdale, AZ 85258 | 1-800-637-7496
© 2024 InEight, Inc. All Rights Reserved | Privacy Statement | Terms of Service | Cookie Policy | Do not sell/share my information